
Save this recipe! 💌
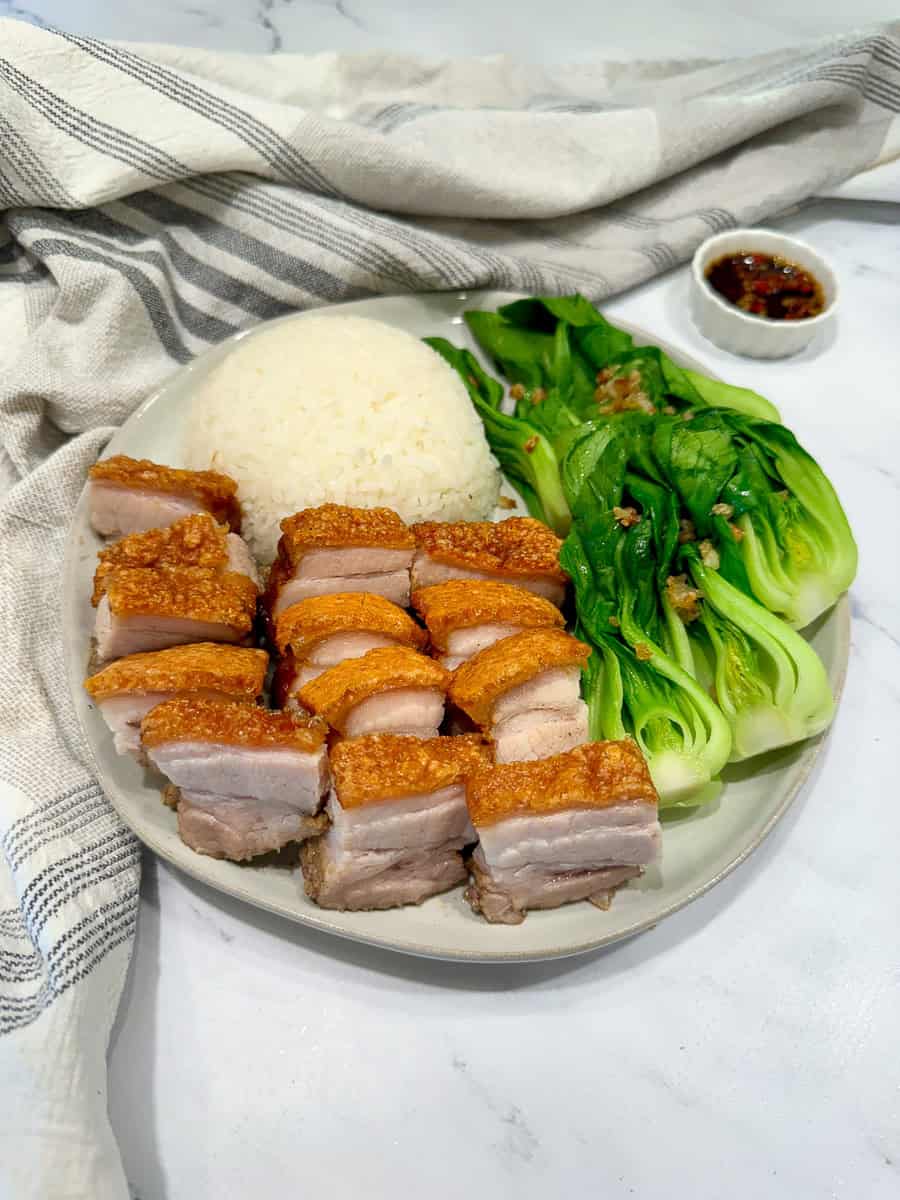
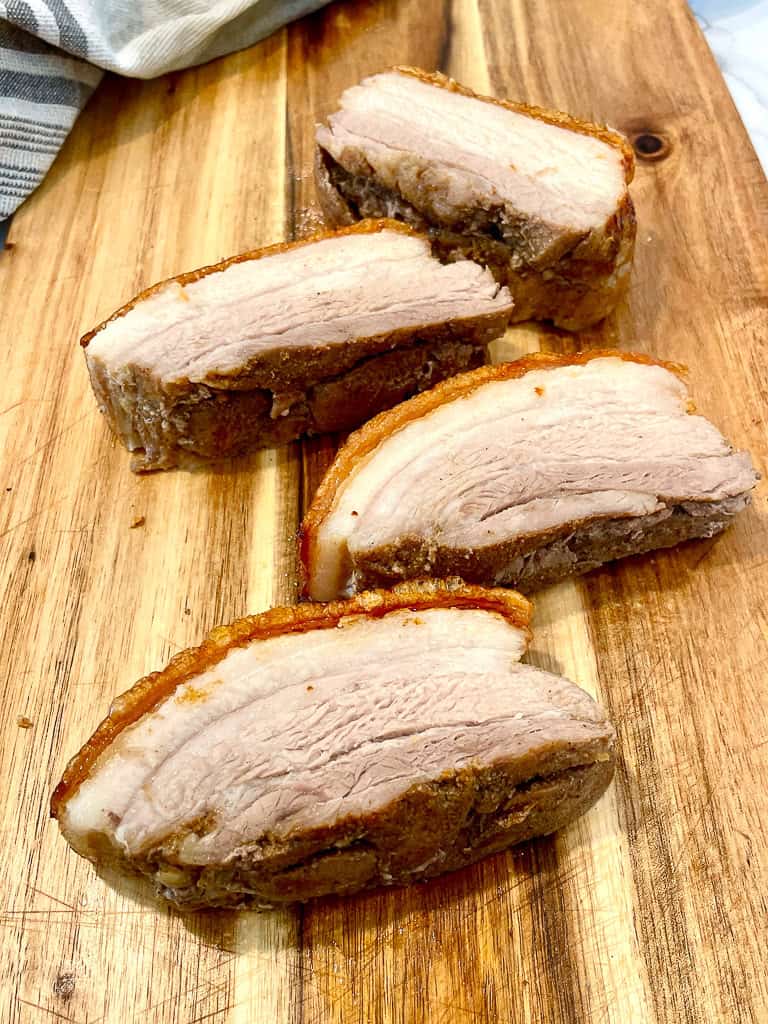
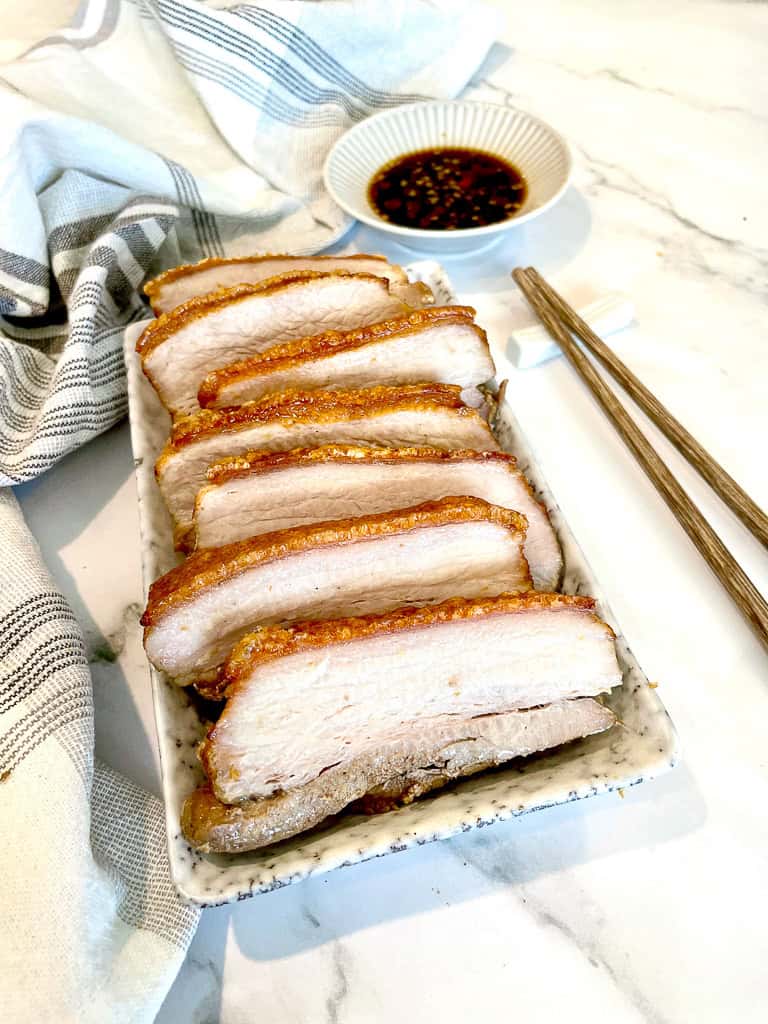
I LOVE crispy pork belly also known as Chinese Roast Pork , but I don't love to pay an arm and a leg for it. Thanks inflation!
This is my BETTER than takeout Crispy pork belly , and it's easy to make! Once you try this recipe you'll be putting the bucks back in your pocket, and you won't be ordering takeout again! Some of my other takeout favorites are mapo tofu, hot & sour soup, and string bean chicken.
Chinese Roast pork (Crispy Pork Belly) was once considered a delicacy and only purchased in our household ONLY for special occasions due to the cost. Now that I am able to create an even better crispy pork belly at home for a fraction of the cost, we are able to enjoy it more often, and guilt free! This recipe has the BEST of both worlds, Air Fryer instructions AND Oven cooking details too!
Have you tried to make Chinese roast pork but it didn't work out for you ?
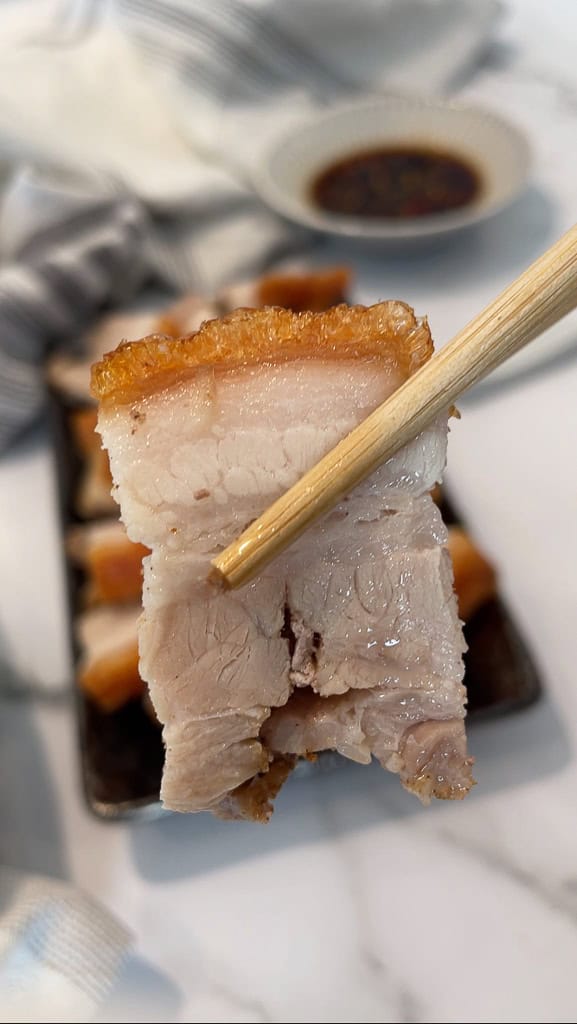
HERE ARE SOME TIPS to get that light crackly skin and a perfectly juicy crispy pork belly.
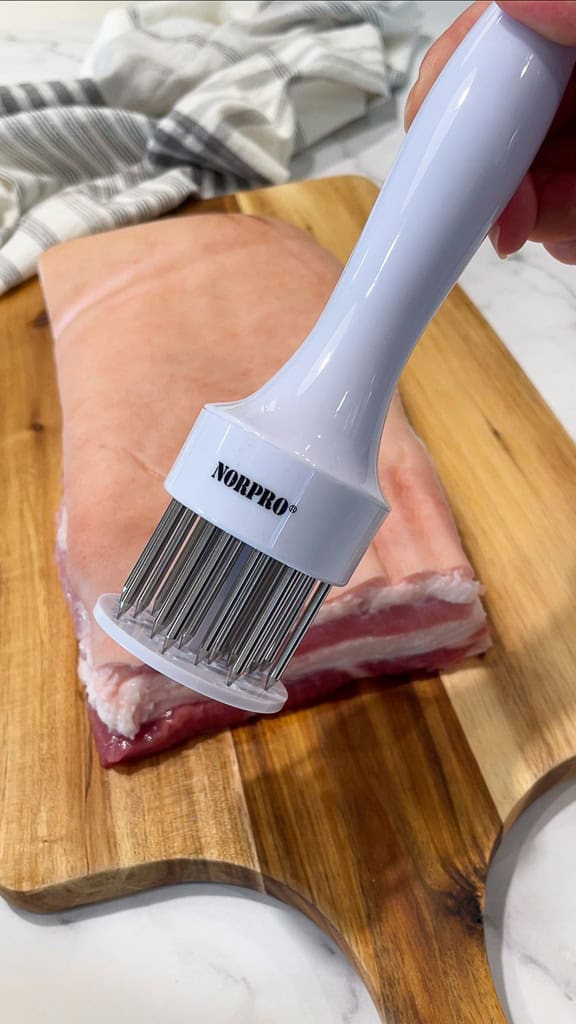
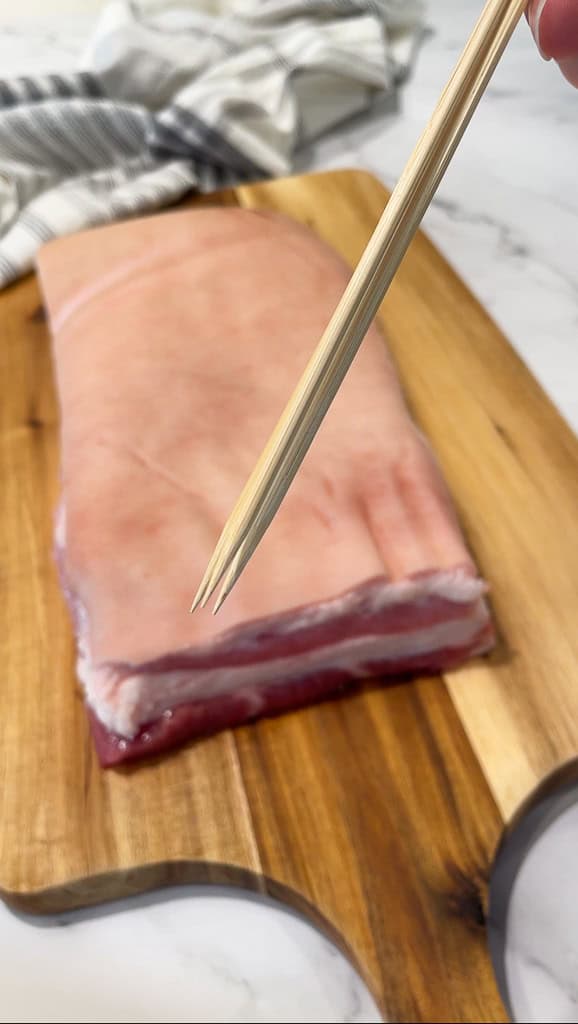
- Holes, and lots of them - The more holes you have in the pork skin, the more opportunity we give the crispy pork belly to fluff up into a nice light and crackly texture. Bonus points and extra puffy skin if you take a sharp knife and poke again lightly after the drying process. We do need to watch out for poking past the skin and fat layer because if we go too deep the juices may run out and interfere with our puffing process.
- Dry Skin & Vinegar - 48 hours may seem like a long time to wait for to pop this baby into the oven, but patience. With that magical 48 hours the crackles of your dreams are just in arms reach. The vinegar helps further dry out the skin, and BONUS helps remove some of that funky smell from the pork.
- High Heat - When the high heat is only applied at the end of the cooking process, the skin will remain soft for the duration of the cooking. When the skin is suddenly exposed to the high heat, it will react by puffing up and resulting in beautiful crackles. From my experience, if the heat is too high during the initial cooking process, the skin hardens too much to puff up.
What if I DON'T have an Air fryer?
This crispy pork belly can also be made in an oven! Oven bake on middle rack at 350 for 50-60 minutes, then Broil at 450 for 10-20 minutes until the skin has puffed up. During this entire broil process please watch the pork belly closely. Your broiler may be at the top or bottom of your oven so put it on the closest rung 12" away to the boiler for the skin puffing process and monitor closely. Please head to the Alternate Oven options listed below for the full oven cooking instructions.
If you LOVE this Chinese Roast Pork, here are some other Air Fryer recipes you might like. Check out these other Easy Air Fryer recipes:


Equipment
- 1 air fryer or oven Oven bake on middle rack at 350 for 50-60 minutes, then Broil at 450 for 10-15 minutes until the skin has puffed up. During this entire broil process please watch the pork belly closely. Your broiler may be at the top or bottom of your oven so put it on the closest rung 12" away to the boiler for the skin puffing process and monitor closely. Please see the full oven instructions below.
- 1 Meat Tenderizer, Toothpicks or Wooden skewer
- 1 Food Brush optional
Ingredients
- 3 lbs Pork Belly
For the Marinade
- ½ tsp Black Pepper
- ½ tsp Garlic Powder
- ½ tsp Onion Powder
- ½ tsp Five spice powder
- 1 tsp Soy Sauce - Low Sodium
- 1 tsp Totole Chicken Powder
- 1 tbsp Shao Xing Cooking Wine
For the Drying Process
- 1 tbsp Salt - I used Kosher (to extract moisture from pork skin)
- 1 tbsp Vinegar
How to make Chinese Roast Pork:
- 1. Combine all the seasoning ingredients (½ teaspoon Black Pepper, ½ teaspoon Onion Powder, ½ teaspoon Five spice powder, 1 teaspoon Soy Sauce - Low Sodium, 1 teaspoon Totole Chicken Powder, 1 tablespoon Shao Xing Cooking Wine, & ½ teaspoon Garlic Powder) into a bowl and mix well and set aside. Do not add in the salt at this time, the salt will be used to draw the moisture out from the skin.
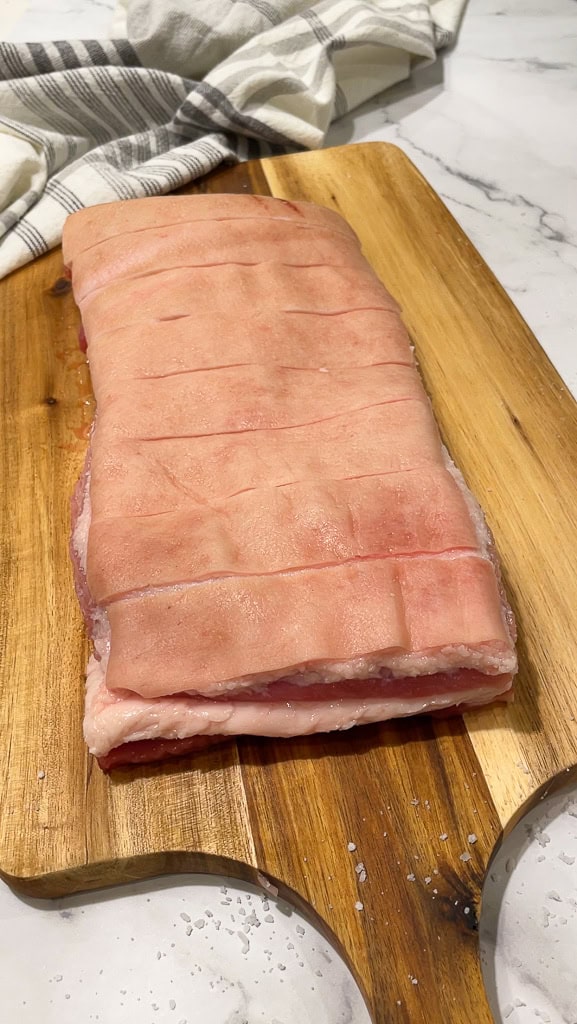
- 2. Place pork belly skin side up and use a paper towel to remove all the moisture.
- 3. Take your meat tenderizer , toothpicks, or skewers to poke the skin. Be careful not to poke too deep. If the meat layer is penetrated, the juices may leak out and interfere with our crackling skin during cooking. The more holes you poke the more opportunity the skin has to puff up.
Drying Out the skin:
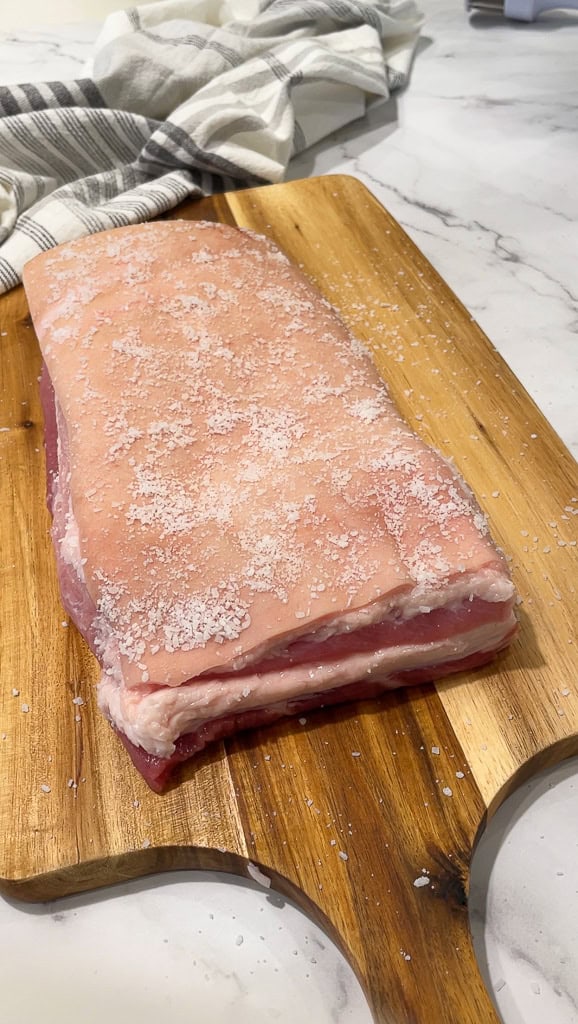
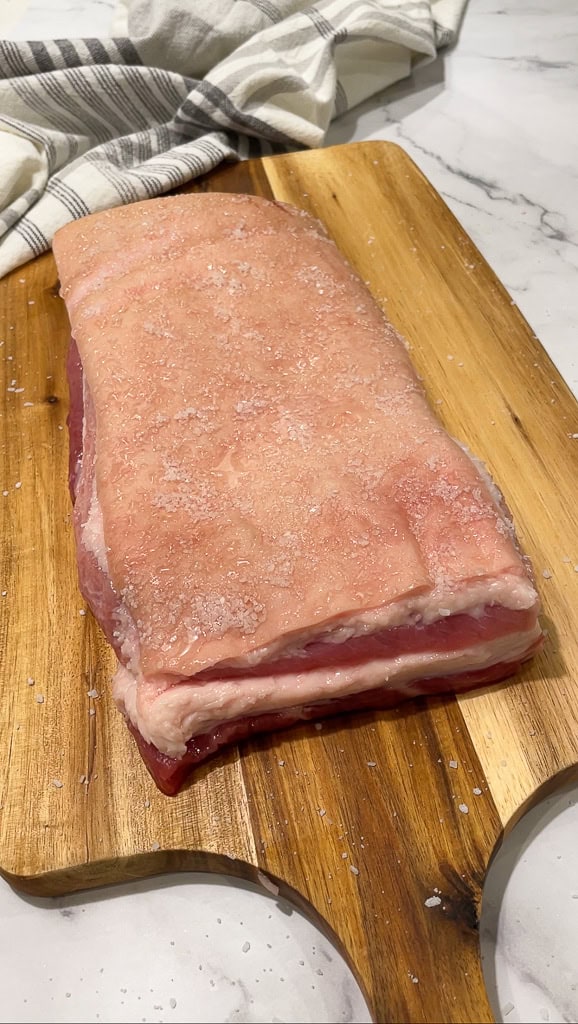
- 4. Cover the skin side of the pork belly with salt (I used Kosher salt). Larger grain salts will be easier to wipe off. Leave salt on the skin for 20 minutes until there are puddles of water on the skin. day (I used Kosher (to extract moisture from pork skin)
- 5. Wipe off all the salt and moisture with a paper towel and flip the pork belly over
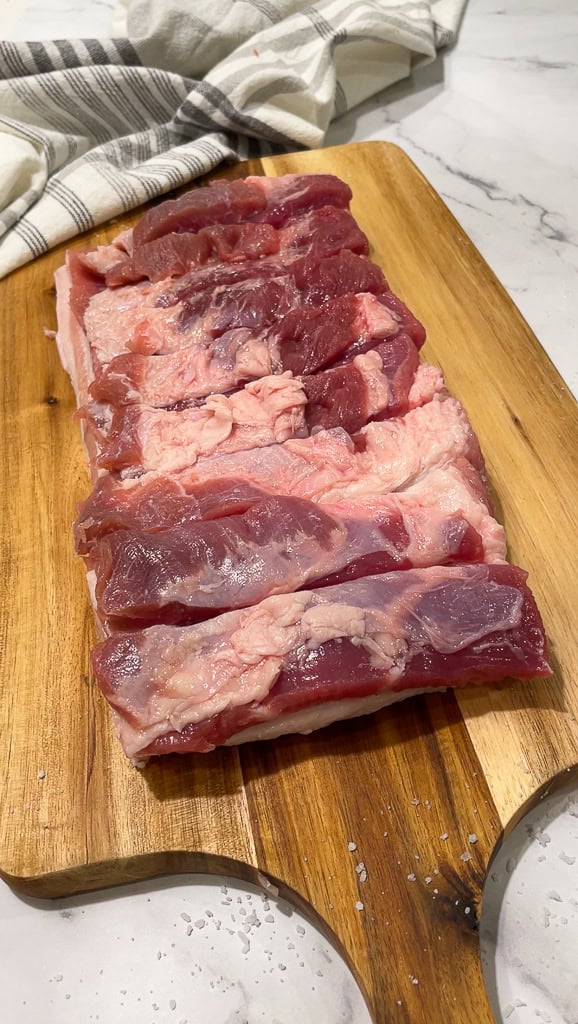
- 6. Cut 1" wide shallow vertical slits on the meat side of the pork belly. This will help the marinade process and assist in cutting the pork belly when it is ready.
- 7. Flip the pork belly over and cut 1" wide shallow vertical slits on the skin side of the pork belly. The slits should just cut through the skin to reveal the fat but not through the fat. These cuts on the slits should be placed at the same intervals as the meat slits so during the final cutting it is easy to cut through in one slice. This step is optional but is very helpful when cutting the pork once completed.
Marinating the Chinese Roast Pork:
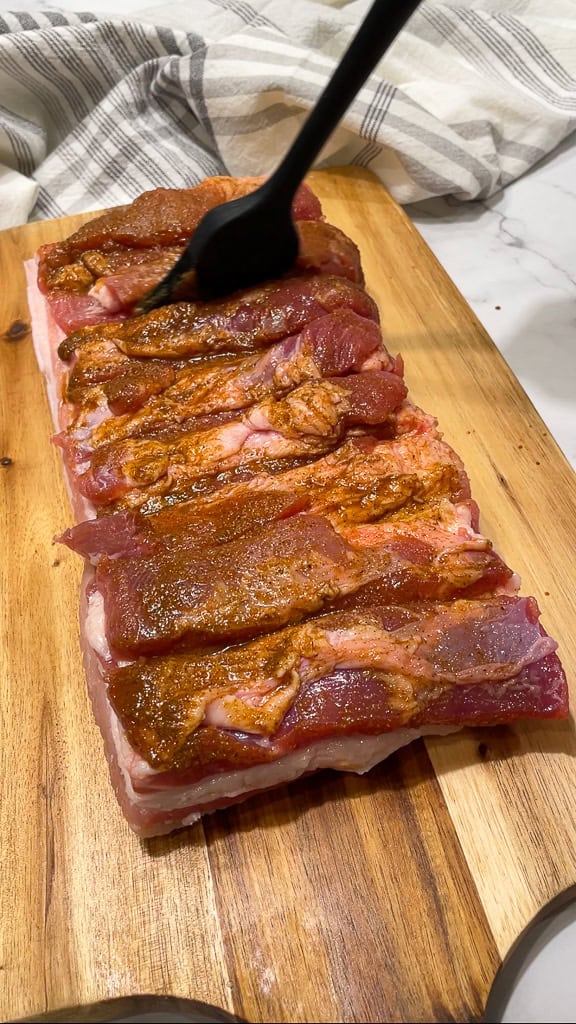
- 8. Flip the pork belly over again, skin side down and apply the marinade with a food brush or pour on and rub in with your hands. Be careful only to marinate the meat portion and into the slits we have cut.
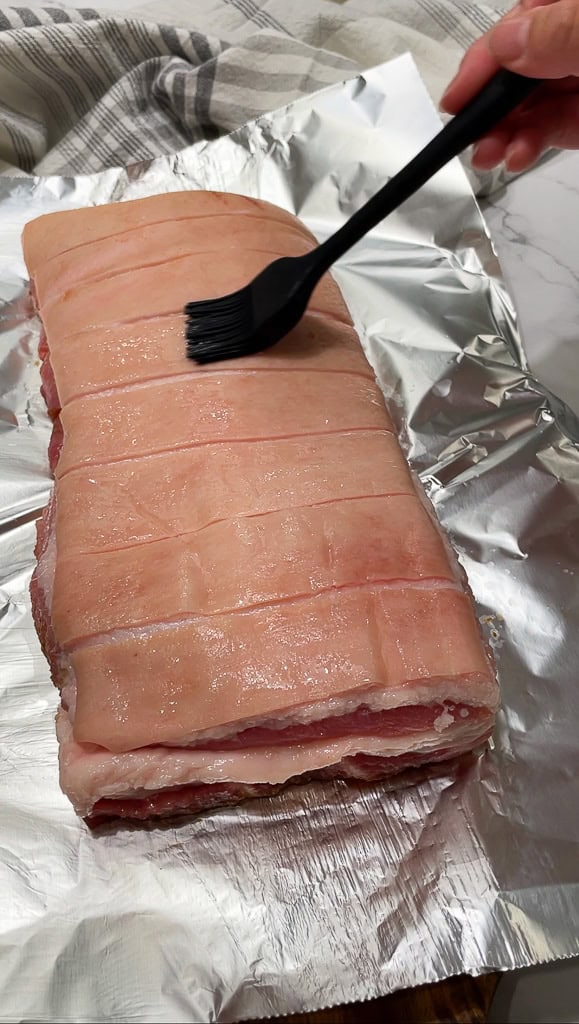
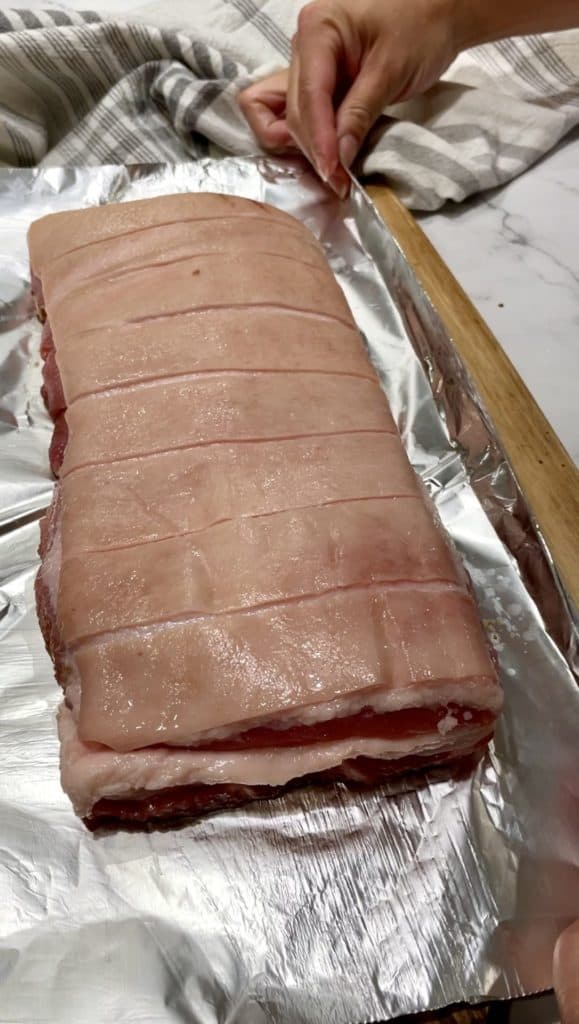
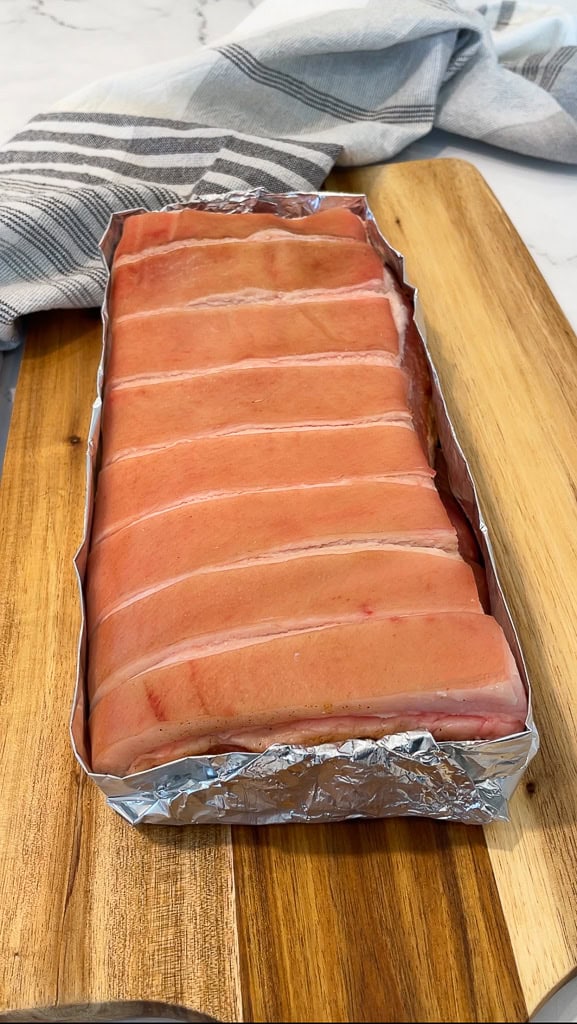
- 9. Flip the belly over one last time, skin side up onto a piece of foil. The foil should be around 3 inches wider and longer than the pork belly itself.
- 10. Use a food brush to apply vinegar to the top of the skin only, or you can carefully spoon the vinegar to the skin and rub it in.
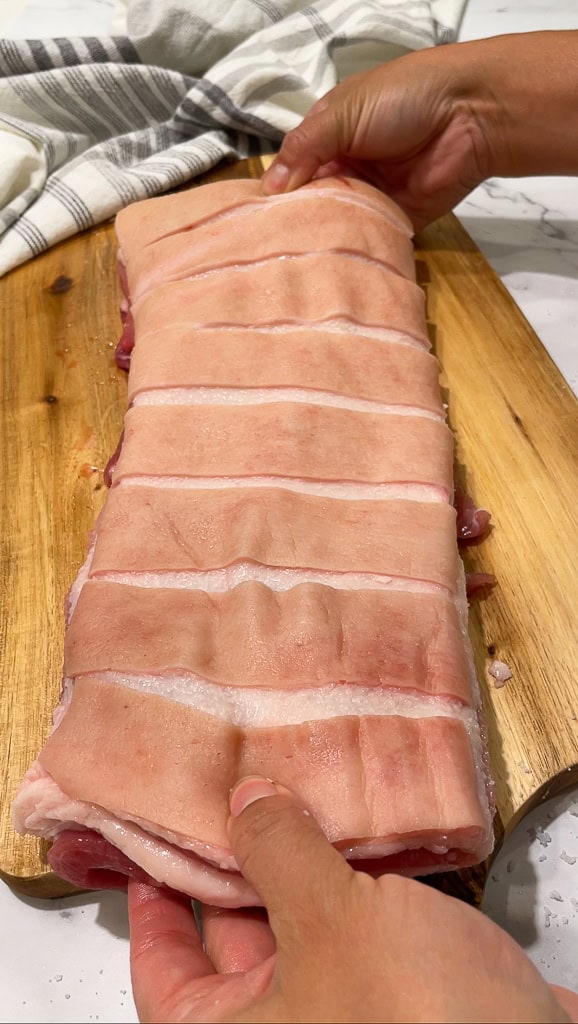
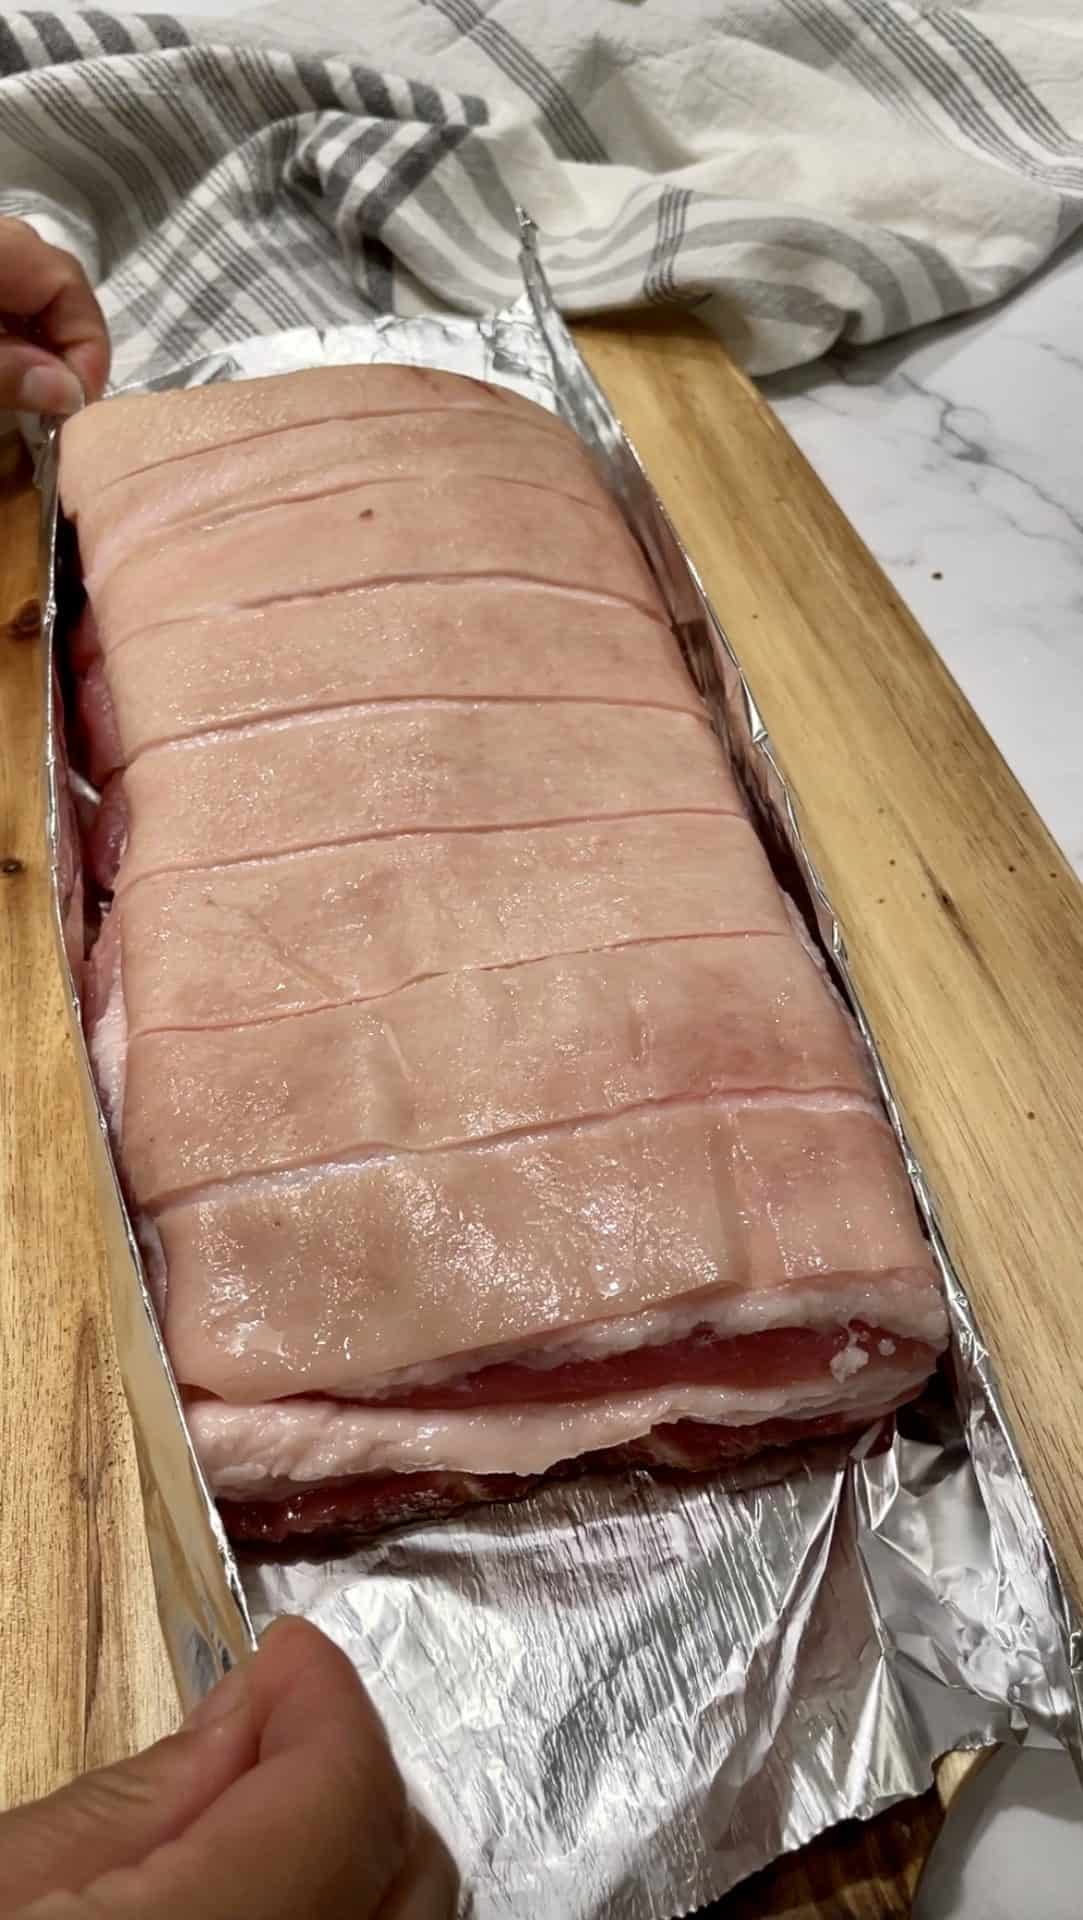
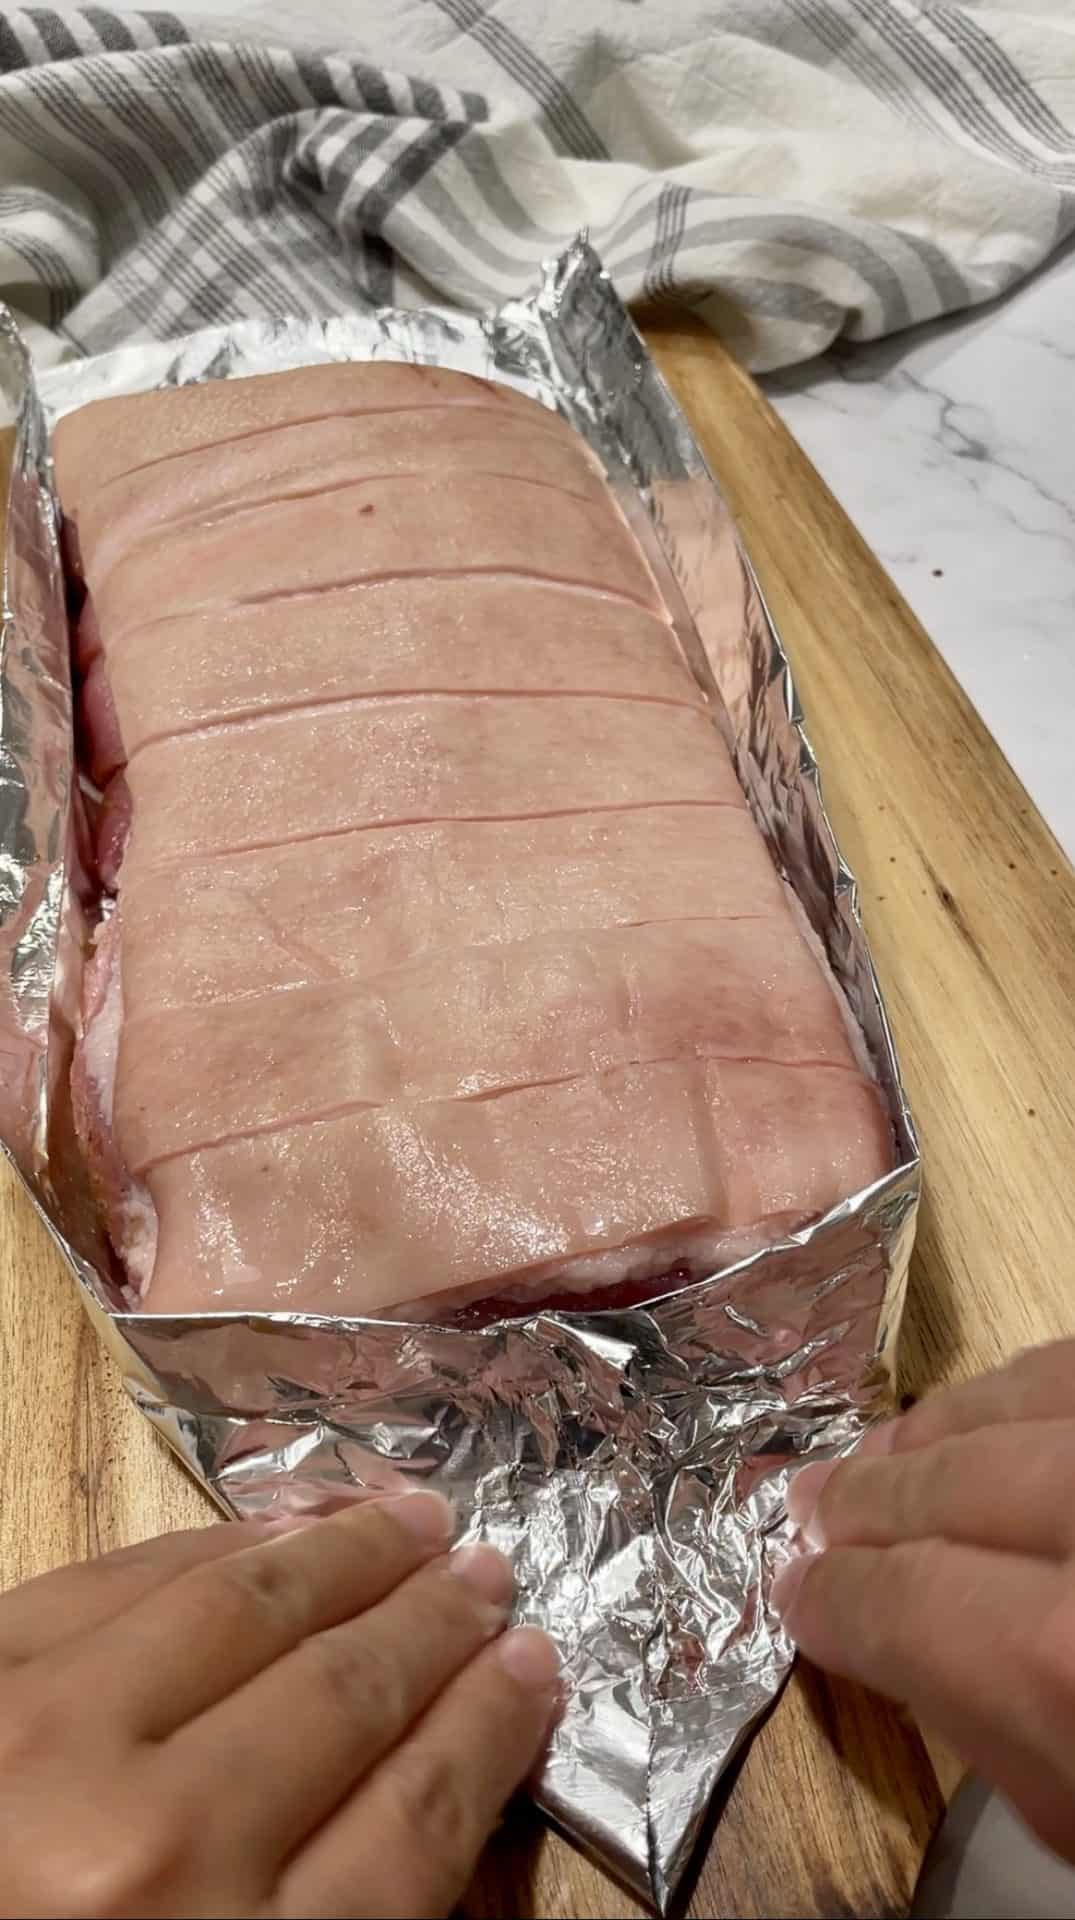
- 11. While the vinegar is drying, it's time to wrap the pork on the sides with the skin exposed. Fold the long side of the of the foil 2- 3 times to create a wall for the pork belly, and repeat on the other side. Wrap the shorter end like a present and tuck into the foil.
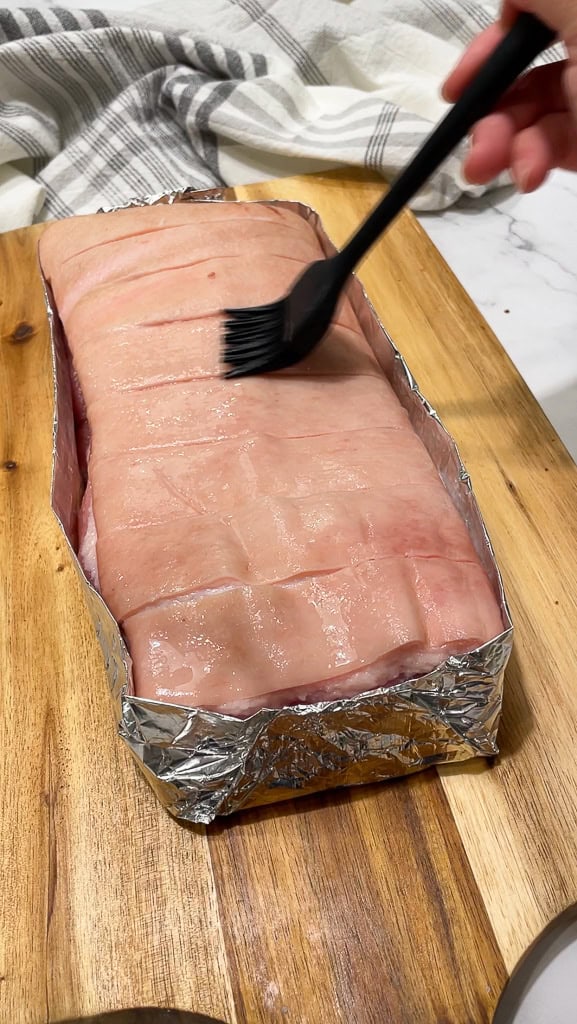
- 12. If any marinade has transferred to the skin, wipe it off.
- 13. Apply vinegar one more time to the skin.
- 14. Now the pork belly is ready to dry out in the refrigerator. I usually transfer my open pork present onto a small baking sheet (or plate) and place it on the top shelf of my fridge for the dry out process.
- 15. 48 hours later the pork belly is ready to go, and the skin should appear darker in color and hard to the touch. For bonus puffy skin, you can take a small sharp knife and give the skin some more pokes.
Air Fryer Cooking Directions ( Oven Directions below this)
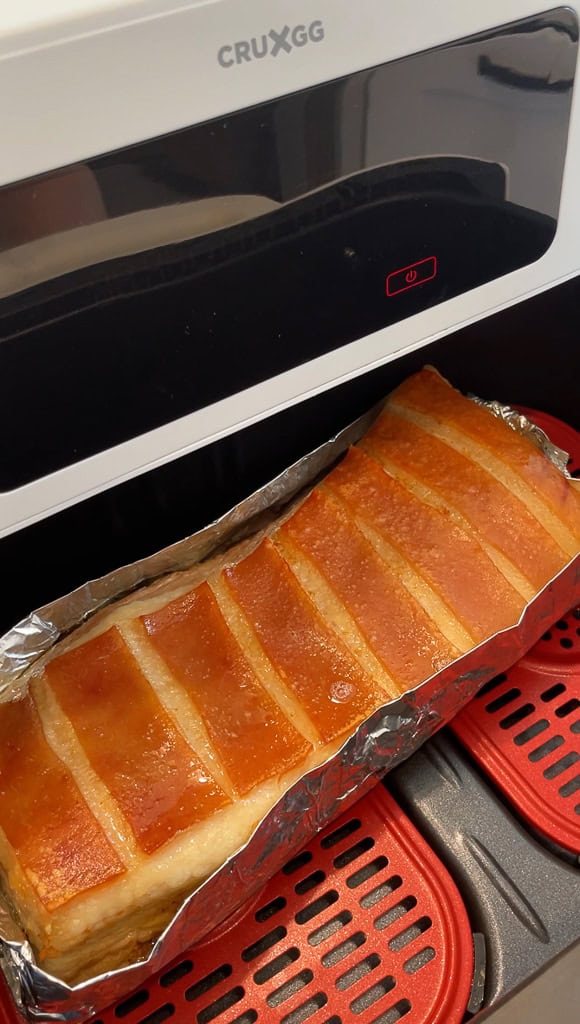
- 16. Preheat your Air fryer to 300°F for 5 minutes and put the pork belly in with the present foil still on the pork. This will help to keep the meat from drying out and make less of a mess inside the air fryer (YAY).
- 17. Cook the pork at 300°F for 30 minutes.
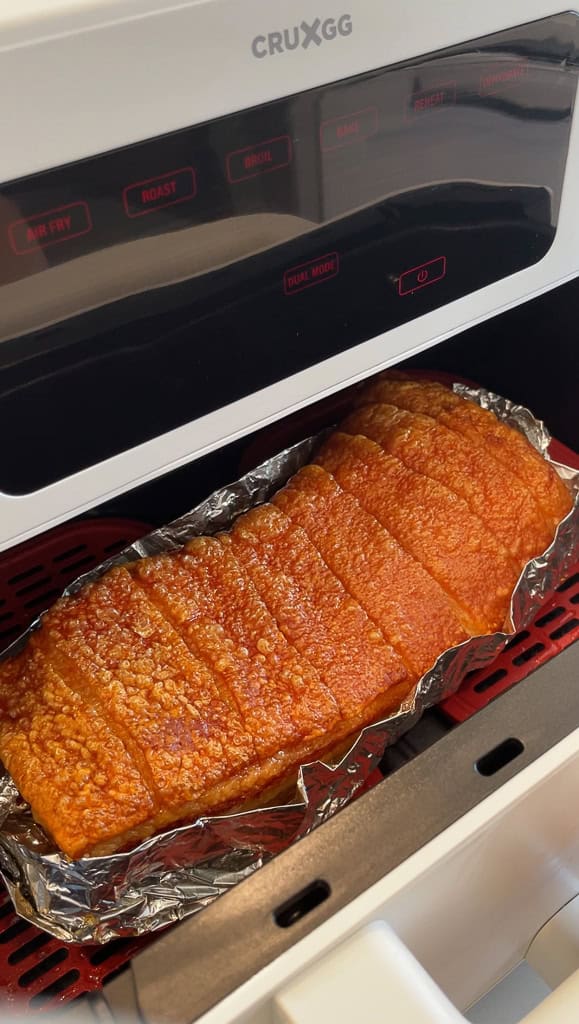
- 18. Turn the Air Fryer up to 400°F and cook for 10-15 minutes until the skin has puffed up. Every Air fryer is different so your time may vary. Take a peek at 10 minutes to check on the action. If your air fryer has a broil option set the temp to 450°F. My Cruxgg Air Fryer has a broil setting and I cook around 10-15 mins at 450°F for my skin to puff up.
- Continue to step 19 - (Alternate Oven cooking times listed below)
Oven Cooking Directions:
- 16. Preheat your oven to 350°F (Convection Bake) and put the pork belly onto a baking sheet and leave the present foil on the pork. This will help to keep the meat from drying out and make less of a mess inside your oven (YAY).
- 17. Cook the pork at 350°F for 50-60 minutes. Notes: At around 50 minutes your internal temp should be 145 deg if you want a cooked but slightly pink meat. At around 60 minutes you will be at 160 deg which will yield in a white cooked pork that is still juicy.
- 18. Turn the Oven to broil at 450°F and cook for 10-20 minutes until the skin has puffed up. During this entire broil process please watch the pork belly closely. Your broiler may be at the top or bottom of your oven so put it on the closest rung 12" away to the boiler for the skin puffing process and monitor closely. If the pork starts browning more on one side, you can rotate it, or use a sheet of foil to cover that side.
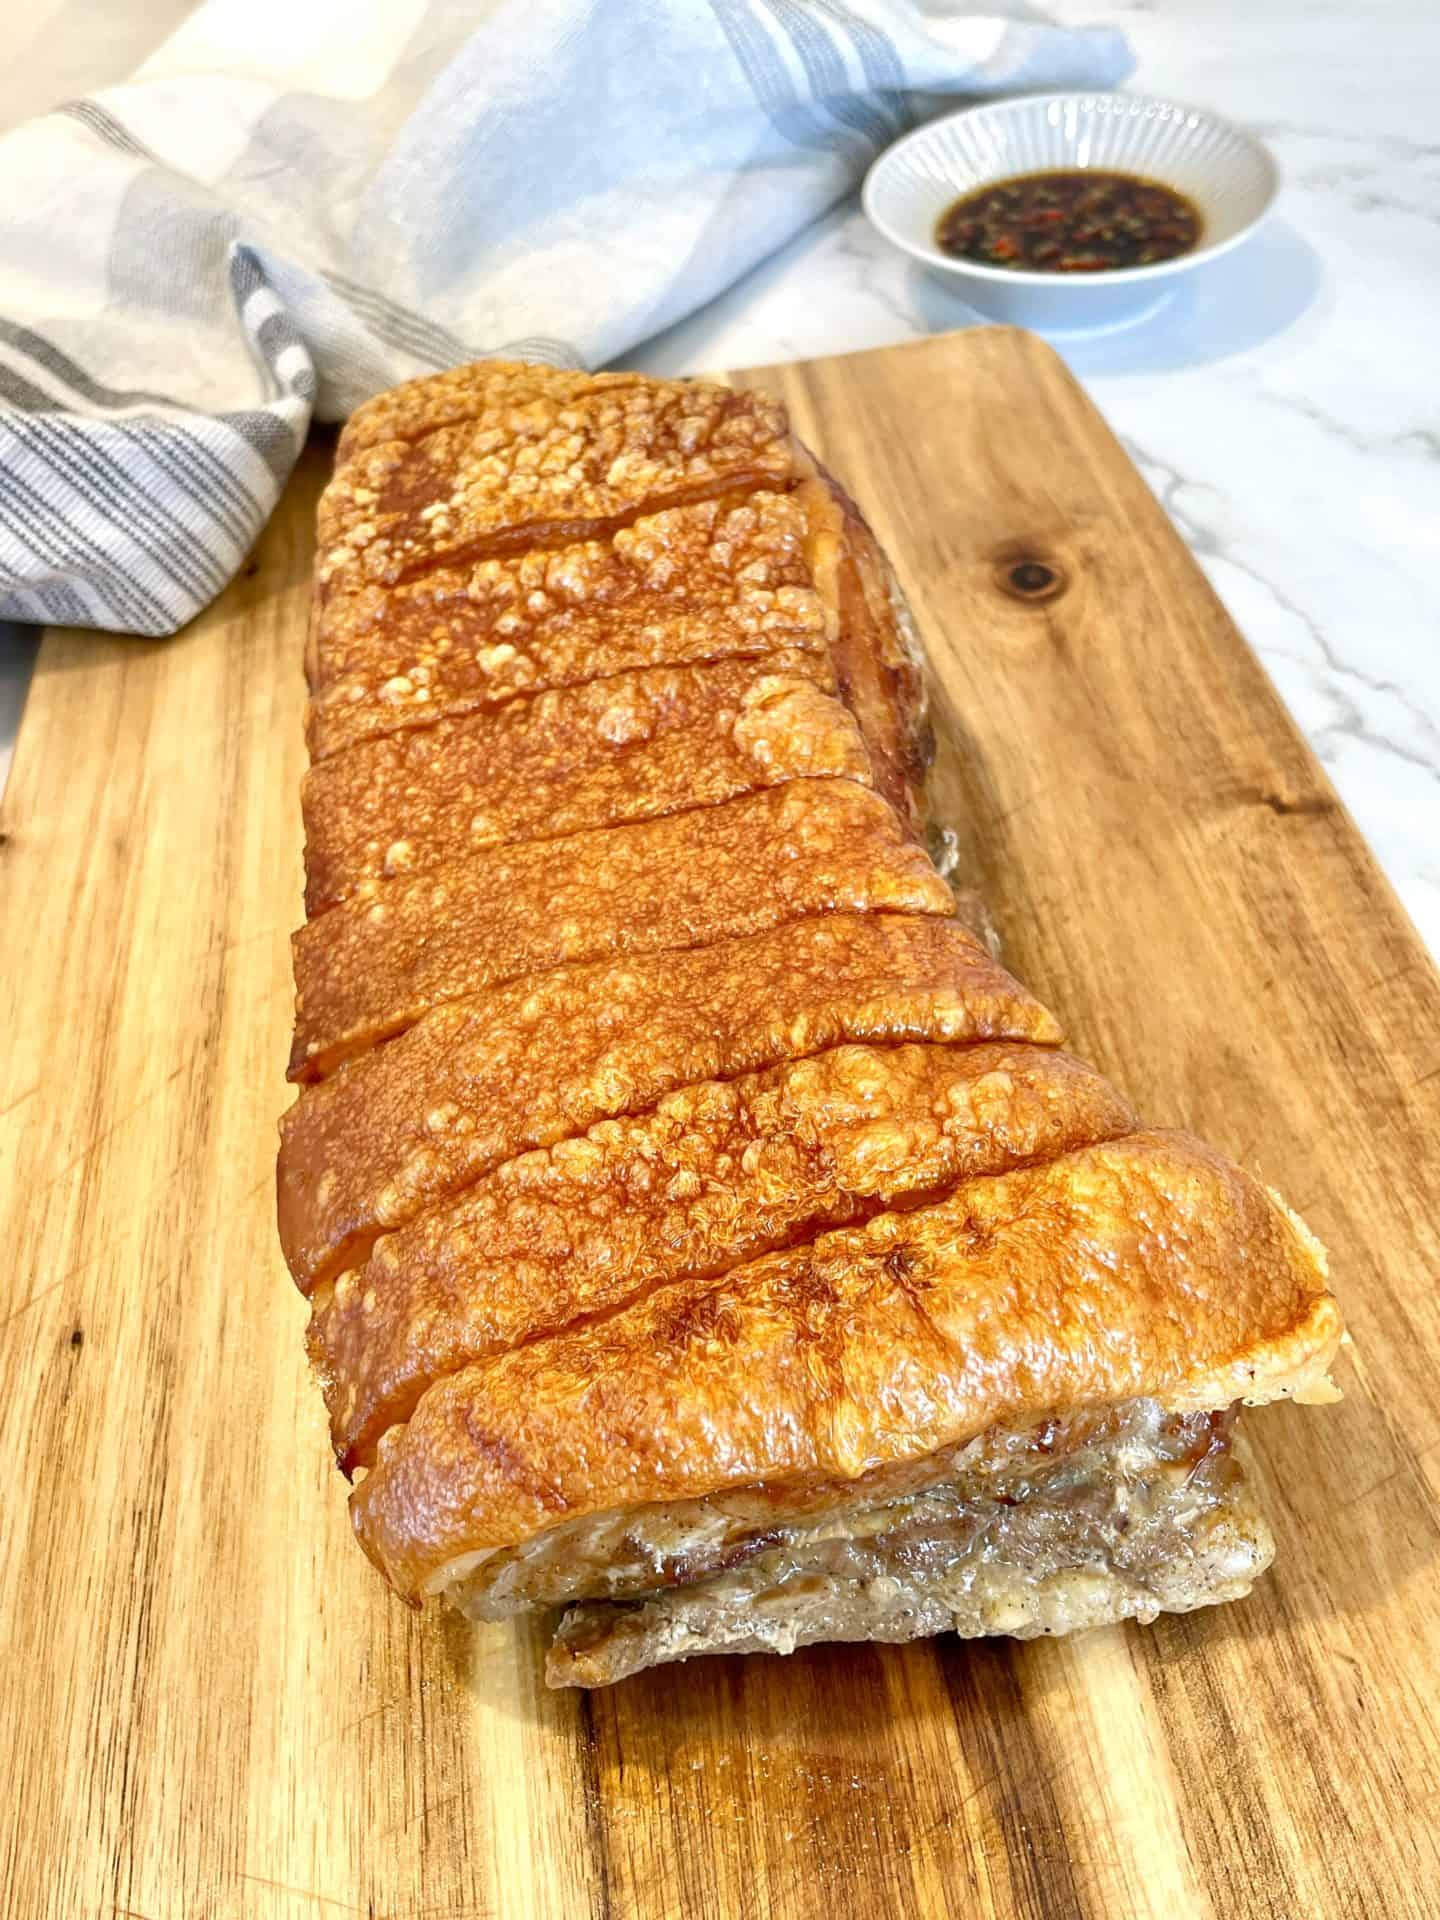
- 19. Once the Chinese Roast Pork is done cooking, Remove and set aside for 10 minutes for the juices to absorb back in (I know this is the hardest part but it will be worth it!)
- 20. Enjoy!
📖 Recipe Card

Easy Chinese Roast Pork Belly Extra Crispy
Equipment

Ingredients
- 3 lbs Pork Belly
For the Marinade
- ½ teaspoon Black Pepper
- ½ teaspoon Garlic Powder
- ½ teaspoon Onion Powder
- ½ teaspoon Five spice powder
- 1 teaspoon Soy Sauce - Low Sodium
- 1 teaspoon Totole Chicken Powder
- 1 tablespoon Shao Xing Cooking Wine
For the Drying Process
- 1 tablespoon Salt - I used Kosher (to extract moisture from pork skin)
- 1 tablespoon Vinegar
Save this recipe! 💌
Instructions
- Combine all the seasoning ingredients into a bowl and mix well and set aside. Do not add in the salt at this time, the salt will be used to draw the moisture out from the skin.½ teaspoon Black Pepper, ½ teaspoon Onion Powder, ½ teaspoon Five spice powder, 1 teaspoon Soy Sauce - Low Sodium, 1 teaspoon Totole Chicken Powder, 1 tablespoon Shao Xing Cooking Wine, ½ teaspoon Garlic Powder
- Place pork belly skin side up and use a paper towel to remove all the moisture.
- Take your meat tenderizer , toothpicks, or skewers to poke the skin. Be careful not to poke too deep. If the meat layer is penetrated, the juices may leak out and interfere with our crackling skin during cooking. The more holes you poke the more opportunity the skin has to puff up.3 lbs Pork Belly
- Cover the skin side of the pork belly with salt (I used Kosher salt). Leave salt on the skin for 20 minutes until there are puddles of water on the skin.1 tablespoon Salt - I used Kosher (to extract moisture from pork skin)
- Wipe off all the salt and moisture with a paper towel and flip the pork belly over
- Cut 1" wide shallow vertical slits on the meat side of the pork belly. This will help the marinade process and assist in cutting the pork belly when it is ready.
- Flip the pork belly over and cut 1" wide shallow vertical slits on the skin side of the pork belly. The slits should just cut through the skin to reveal the fat but not through the fat. These cuts on the slits should be placed at the same intervals as the meat slits so during the final cutting it is easy to cut through in one slice. This step is optional but is very helpful when cutting the pork once completed.
- Flip the pork belly over again, skin side down and apply the marinade with a food brush or pour on and rub in with your hands. Be careful only to marinate the meat portion and into the slits we have cut.
- Flip the belly over one last time, skin side up onto a piece of foil. The foil should be around 3 inches wider and longer than the pork belly itself.
- Use a food brush to apply vinegar to the top of the skin only, or you can carefully spoon the vinegar to the skin and rub it in.1 tablespoon Vinegar
- While the vinegar is drying, it's time to wrap the pork on the sides with the skin exposed. Fold the long side of the of the foil 2- 3 times to create a wall for the pork belly, and repeat on the other side. Wrap the shorter end like a present and tuck into the foil. (Scroll up for pictures)
- If any marinade has transferred to the skin, wipe it off.
- Apply vinegar one more time to the skin.
- Now the pork belly is ready to dry out in the refrigerator. I usually transfer my open pork present onto a small baking sheet (or plate) and place it on the top shelf of my fridge for the dry out process.
- 48 hours later the pork belly is ready to go, and the skin should appear darker in color and hard to the touch. For bonus puffy skin, you can take a small sharp knife and give the skin some more pokes.
Air Fryer Cooking Instructions ( Oven Instructions below this)
- Preheat your Air fryer to 300°F for 5 minutes and then put the pork belly in with the present foil still on the pork. This will help to keep the meat from drying out and make less of a mess inside the air fryer (YAY).
- Cook the pork at 300°F for 30 minutes.
- Turn the Air Fryer up to 400°F and cook for 10-15 minutes until the skin has puffed up. Every Air fryer is different so your time may vary. Take a peek at 10 minutes to check on the action. (My Air Fryer has a broil setting and I cook around 10 mins at 450°F for my skin to puff up)
- Once the Roast Pork is done cooking, remove from air fryer and set aside for 10 minutes for the juices to absorb back in. (I know this is the hardest part but it will be worth it!)
- Enjoy!
Oven Cooking Instructions
- Preheat your oven to 350°F (Convection Bake) and put the pork belly onto a baking sheet and leave the present foil on the pork. This will help to keep the meat from drying out and make less of a mess inside your oven (YAY).
- Cook the pork at 350°F for 50-60 minutes. Notes: At around 50 minutes your internal temp should be 145 deg if you want a cooked but slightly pink meat. At around 60 minutes you will be at 160 deg which will yield in a white cooked pork that is still juicy.
- Turn the Oven to broil at 450°F and cook for 10-20 minutes until the skin has puffed up. During this entire broil process please watch the pork belly closely. Your broiler may be at the top or bottom of your oven so put it on the closest rung 12" away to the boiler for the skin puffing process and monitor closely. If the pork starts browning more on one side, you can rotate it, or use a sheet of foil to cover that side.
- Once the Roast Pork is done cooking, remove from the oven and set aside for 10 minutes for the juices to absorb back in. (I know this is the hardest part but it will be worth it!)
- Enjoy!
Video
Notes
- 16. Preheat your oven to 350°F and put the pork belly in with the present foil still on the pork. This will help to keep the meat from drying out and make less of a mess inside the oven (YAY).
- 17. Cook the pork at 350°F for 50-60 minutes.
- 18. Turn the Oven to broil at 450°F and cook for 10-20 minutes until the skin has puffed up. During this entire broil process please watch the pork belly closely. Your broiler may be at the top or bottom of your oven so put it on the closest rung 12" away to the boiler for the skin puffing process and monitor closely.


Kelly says
Hi! I love Chinese crispy pork belly, and have had success making it in the oven before (very similar to your steps!) but I just bought an air fryer so I'm SO excited to try this!!
I have a different air fryer than you, based on the pictures -- mine is more circle-shaped vs your longer rectangular one. I probably can't fit a whole/normal pork belly in, and will prob have to cut it in half lengthwise. Do you think I'll need to cut back on any cook time? (either the first 30min, or the final broil?)
Thanks!!!
The Savory Chopstick says
Hi Kelly! The cooktime should be the same. The pork belly does shrink a big during the cook process too. I’m so excited to see your results, please let me know how it goes !
раскрутка сайтов says
This is a really good tip particularly to those fresh to the blogosphere.
Simple but very accurate information… Thanks for sharing this one.
A must read article!
Как выбрать японские подгузники? says
Fantastic goods from you, man. I've understand your stuff previous
to and you are just too magnificent. I really like what you have acquired here, certainly like what you're stating and the way in which you say
it. You make it enjoyable and you still take care of to keep it sensible.
I can not wait to read far more from you. This is really a
terrific web site.
Joanne says
Super easy to make. But you really have poke the pork belly skin to make sure it gets crispy
The Savory Chopstick says
Hi Joanne! I am so glad you enjoyed this recipe. The poking of the holes is my least favorite part since its so time consuming but its so rewarding at the end 😆
Blair says
Hello! Do you use Twitter? I'd like to follow you if that would be
okay. I'm undoubtedly enjoying your blog and look forward to new updates.
Brian says
Hey There. I discovered your weblog the use of msn. This is a really smartly written article.
I will be sure to bookmark it and return to read more of your useful information. Thanks for the
post. I will certainly comeback.
Colin says
Heya i am for the first time here. I found this board and I find It really helpful & it helped me out much.
I'm hoping to present something again and help others such as you
aided me.
Kathy says
Thanks for this recipe, it ws definitely a favourite with my family. Very simple and easy directions and came out delicious. I can’t wait to try your other recipes.
TheSavoryChopstick Recipes says
Hello again Kathy! Thank you so much for your support and trying this recipe as well. I am so happy you and your family enjoyed this one, It is one of our favorites as well. -Sharon